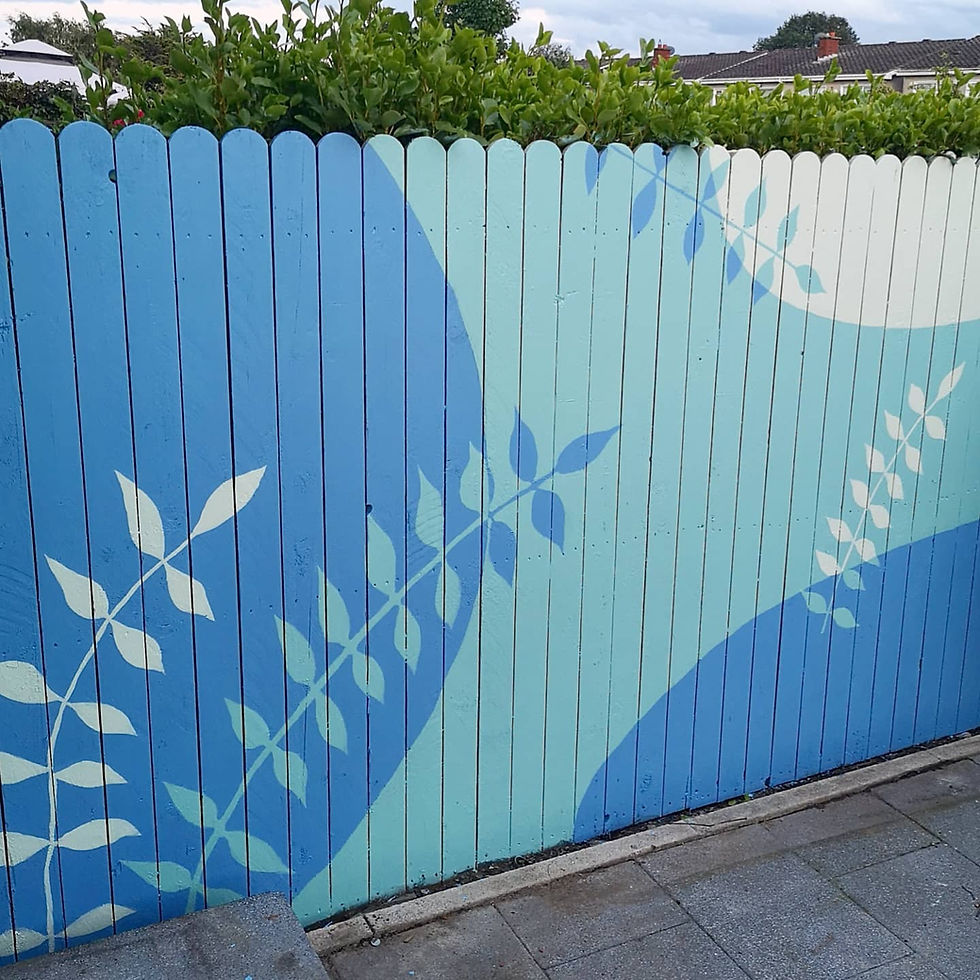
Hi all, it's been forever since I've written a blog post so bear with me whilst I remember how to spell.
If you follow me on ... well, anything, you'll have seen my outdoor mural on some fencing in my parent's house (my dad brings up the fact that it's his name on the deeds when I say MY house). I thought I'd share this process with you as I think it is a super cost-effective way to create a statement in your garden. Nothing makes me happier than looking out on a rainy day and seeing all of the colour I've injected. Although I must admit, I love rainy days in general. Scroll down to the bottom of this post for my Youtube tutorial on this project also.
Anyways here's what you need to know;
What you'll Need;
Sugar soap
Sponge
Sand Paper
Dust sheets
Primer
External wood paint
Mini rollers
Paintbrushes in various sizes
Small artist's paintbrushes
How it's Done;
Create your design- I recently taught myself how to draw on a tablet so that's how I created my design. This allowed me to layer up various leaves and colour combos, copy and paste until I was happy with the result. This can be done using a simple sketch or by cutting out your shapes and playing around with the composition this way. I would recommend a plan though because nobody wants to see a hot mess from their kitchen window every day.
Clear your area- Remove any objects in the way of your fence. This required my dad's help as we had so much heavy stuff to be moved around and I'm just a mere woman child with no strength. Make sure you're able to get to the bottom of your fence and there's no dirt that will get caught on your paintbrush (I didn't do this... goodbye Zibra chiseled wedge).
Clean your fence- Using sugar soap or some fairy liquid and water, wash down your fence to remove all cobwebs and durrrrty marks. This will allow for a smooth finish and proper adhesion of the primer. Make sure to use water to remove all of the soap after cleaning. Allow this to dry fully before sanding or painting.
Sand your fence- I used an electric sander on the fence. It just needs to be lightly keyed if the fence is in good nick, but if not you may need to sand any rough spots and fill in any holes from general wear and tear.
Prime- I used Otex primer from Carlow paint hub in a blue colour close to my final colour which allows for better coverage. I used two fussy blokes rollers for this. Their 15mm rollers (which should be released soon in Ireland) worked wonders on the rougher areas of the fence, they know how to deal with us roughians.
Draw your background- I used a nail and string with a pencil attached to create curves for the background shapes. BanyanBridges both explains and does this better than I so check out this blogpost. I feel like if Racheal lived in Ireland we'd be best friends.
Paint the background- Again using my roller I painted the background. First I cut in a couple of shapes that were making up the background using a Zibra chiseled wedge then filled in the shapes using a roller.
Build up your design layer by layer- I began adding long stems with leaves all over them and filling up my space. I then created a large monstera leaf cut out from card to create a template.. I used this as more of a size guide than something to trace as I wanted them all to have a life of their own, as leaves do. You'll see from the picture I decided to add a dark dramatic colour at the end to create more depth as these are at the forefront.
Clean up the edges cutting around shapes using the background colour on a small artist's paintbrush to create sharper edges. This is very important for messy painters like myself as I constantly have to fix things up and this saved me big time. Also because fences aren't the smoothest it really allows you to get a flawless finish.I've added some pictures of the progress of the mural below. It wasn't as straightforward as painting on my rather smooth bedroom wall, but it was very satisfying. The most difficult part about it was honestly waiting for it to stop raining so I could FINALLY finish it.
I hope this was helpful and if you try it out be sure to tag me!
Make sure to check out my Youtube tutorials for more tips.


Colours used- Everal Aqua in cucumber, Tiffany and Daydream. Farrow and Ball in Studio Green.
Comments