Groovy Retro Desk Upcycle
- Sarah Murphy-Colourfulsaz
- Jul 5, 2022
- 2 min read

Hi all, welcome back to my blog. As always I have a super colourful retro furniture flip for you. Scroll to the end of this blog for the video tutorial.
This was a table my parents were throwing out. They say yes to everything anyone offers them and then it sits in my house for a few years ... until eventually, they throw it out as well. It's gotten me a few weird and wonderful pieces of furniture over the years. (Remember that sewing box? Yep another thing they were getting rid of.)

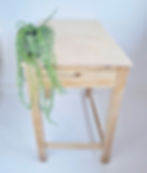
As you can see it needed a LOT of work. The table top was completely destroyed and the wood was stained and extremely dirty. I washed the table countless times. Replaced the table top and sanded back all the wood. I got the plywood from my dad and got it cut from Larry's DIY on gracepark road.
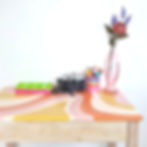
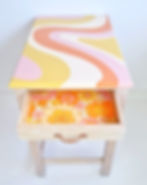
Once this was done the wood was a bit yellowy in places so I decided to use white oil from Fusion to finish off the wood. I started thinking about my design and I knew I wanted to include this retro floral wallpaper from Spoonflower. Using this as a guide I picked out some colours that I thought suited both the wallpaper and the colour of the wooden table as I kept the legs unpainted.

Once I had the drawers lined, painting the tabletop was super simple. I just drew out some rough curves and painted in the stripes. I also spraypainted the hardware to save them from the skip as well.

I absolutely love how this project turned out. Check out my video below for full instructions and some behind-the-scenesnes mistakes I made along the way.